

This post contains affiliate links (marked with an asterisk ‘*’). Read my full disclaimer here.
Over the last few months, I’ve become obsessed with tinting my eyebrows – and occasionally, my eyelashes. Here’s how I do it at home.
The first time I tinted my eyebrows, it was kind of a big deal. I’ve actually never been able to see my eyebrows without makeup before (curse of being ginger, I guess) – and then, there they were! It turns out that my brows aren’t as sparse as I originally thought, and they’ve got a pretty decent natural shape and arch. Now I like to dye them myself every couple of weeks using the Eyelure Eyebrow Kit in Dark Brown*, and have also tried the Eylure Dylash Kit in Dark Brown* for my eyelashes.
Are you going to get the same results that you would at Benefit Brow Bar? No – because the people there actually know what they’re doing. But this is still a good option if you want to maintain the colour in-between appointments; prefer a more subtle result; or just want to save some money. (Or maybe if you’re like me, and just cannot be bothered going to town every six-eight weeks.)


Before We Get Started…
Just a quick note to say that in this tutorial, I’ll be tinting my eyebrows and eyelashes at the same time. However, if you’re a beginner, I’d advise doing your eyelashes separately – if you get the dye in your eyes, it really, really stings. (I’ll be the first to admit that dying my eyelashes isn’t always worth the time, as my eyelashes are pretty crap regardless. However, the result will look much better on you if your lashes are naturally quite long.)
You Will Need:
- Eylure Dybrow Kit in Dark Brown* – includes the cream colour, activator, mixing tray, applicator, mixer, and mascara wand.
- Eylure Dylash Kit in Dark Brown* – includes the activating gel, developing gel, mascara wand, and mixing tray.
- Cleansing wipes*.
- Cotton buds*.
- Cotton pads*, or tissues.
- Vaseline*, or some other petroleum jelly, lip-balm-type thing. (Sometimes I skip this, but I’d recommend having some around for beginners.)
Eylure Dybrow and Dylash Tutorial:


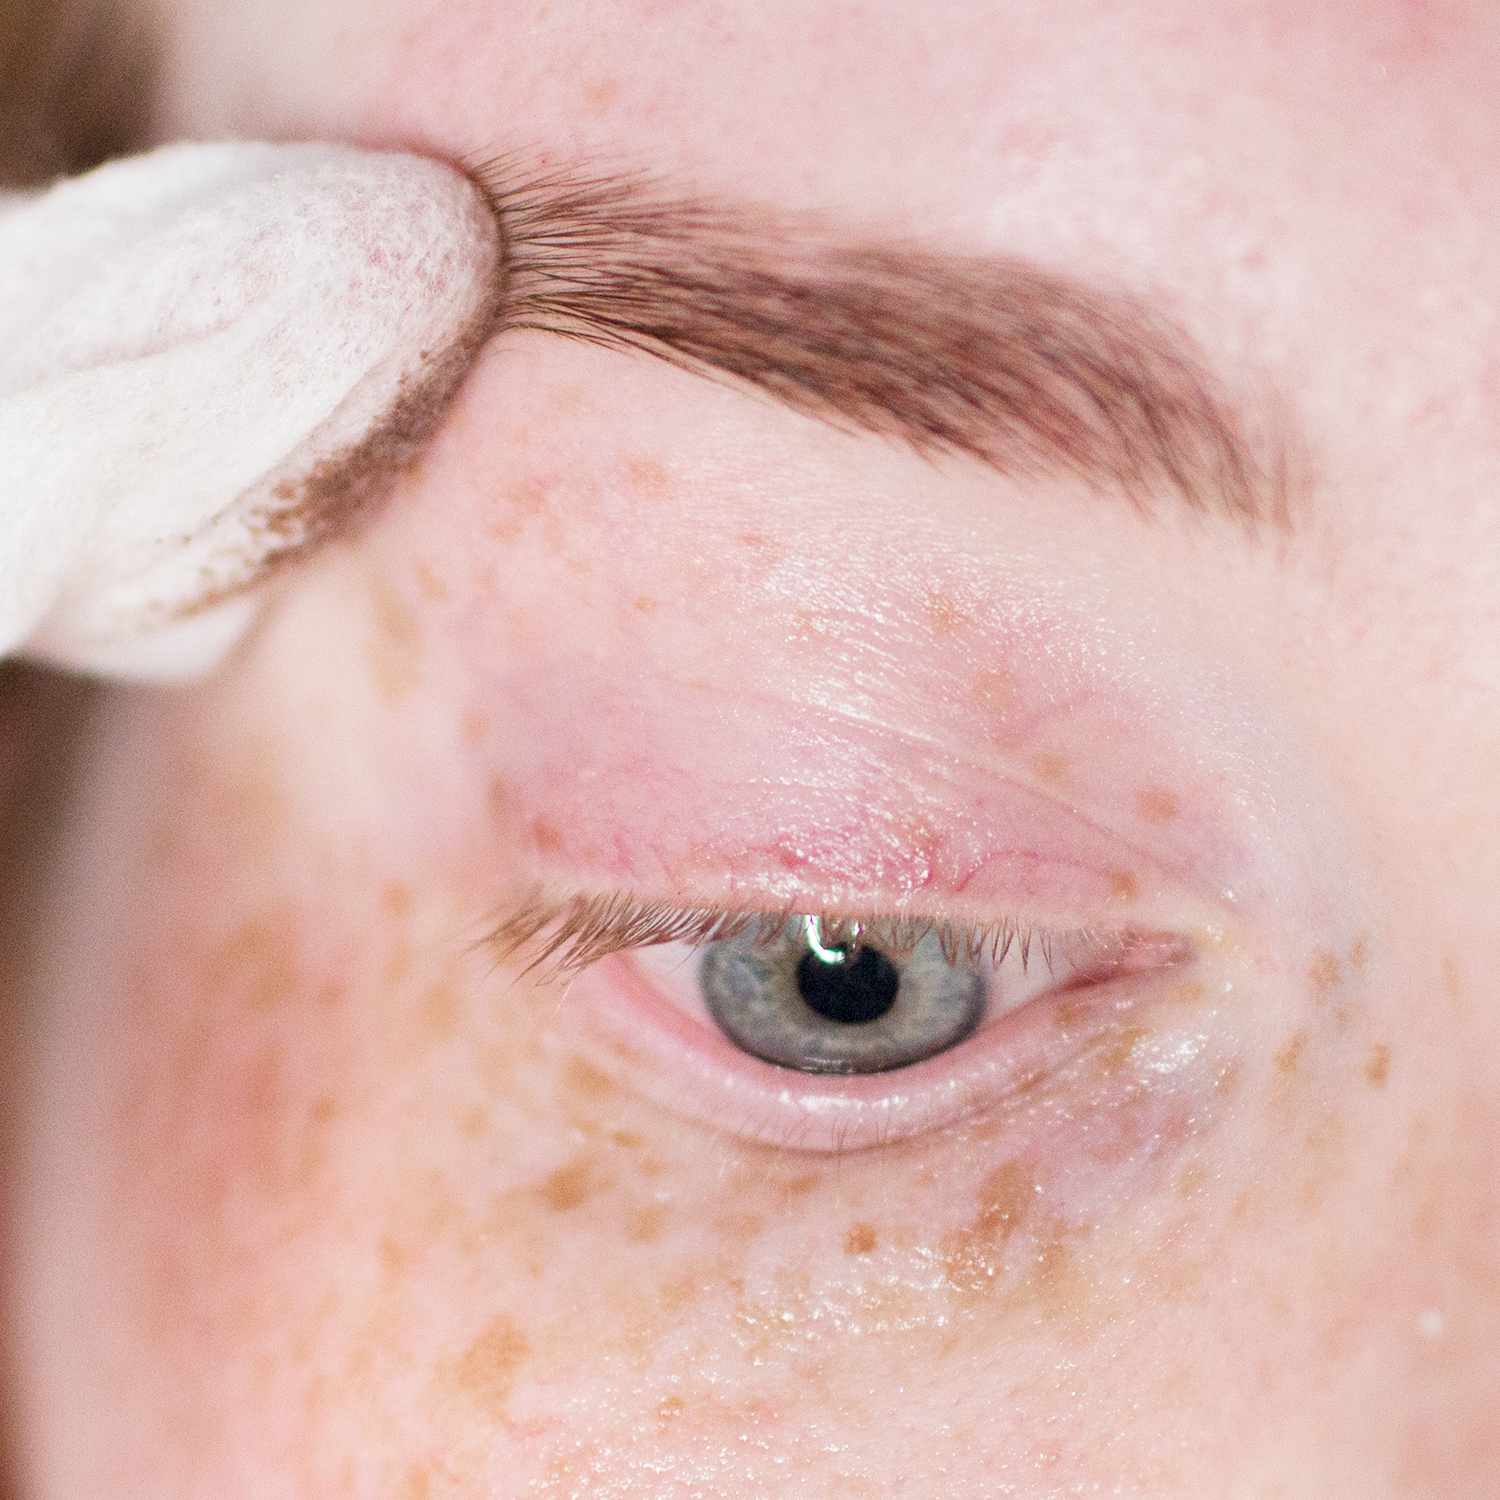
Start off by cleaning the eye area with a cleansing wipe. This will remove any remaining makeup or oils from the skin. Don’t use any moisturiser for now – but if you’re worried about staining, apply some Vaseline around the eyebrow and on the eyelid, but avoiding the the brow and lashes themselves.
Open up the Dybrow kit, and pour 2cm of the dye cream in to the mixing tray. Then add five drops of the activating solution. Mix them together with the supplied applicator. (This might take a minute, sometimes the two substances just refuse to mesh together.)
Now, dunk the mascara wand in the mixture, and apply it to your eyebrows. Really get in there and make sure all the hairs are coated, and do a few strokes back to front as well to make sure the entire hair is saturated. If any dye ends up on the skin around the eyebrow, wipe it away with a cotton bud. (You can put a bit of micellar water on the cotton bud if it’s not budging.)

The Dybrow needs to develop for five to ten minutes, depending on the desired result. I usually leave mine on for the full ten minutes – then if it’s still not as bold as I’d like, I mix up more dye and leave it on for a few more minutes.
While the dye is developing, you can get started on the eyelashes if you wish. Squeeze 1cm of the activating gel on the tray, and coat your mascara wand in the stuff. Apply it to the lashes, but don’t go overboard like we did on the eyebrows – one coat is fine, especially if you have sensitive eyes. Leave on for between two and eight minutes. (You won’t see any colour change at this point.) Again, I like to go for the full eight minutes.
Going back to the eyebrows: if you’re happy with them, remove the Dybrow with a cleansing wipe. By the time they’re clean, it’s probably time to clean the lashes as well. Fold a cotton pad in half and gently remove the activator gel by pulling the lashes away from your eye. Make sure to clean the mascara wand used with the Dylash as well, by wiping it with a tissue.
Now it’s time to squeeze 1cm of the developing gel from the Dylash kit on to the mixing tray, and coat the mascara wand. Warning: this stuff stings. Be careful when applying, and don’t be generous with the product like you would when applying a mascara. If you find this a bit tricky, try doing one eye at a time, and keep your eyes closed while the gel develops. Leave on for between one and four minutes. (I do the full four minutes.)
When you’re finished, clean your lashes using a cotton pad like you did earlier – and that’s it! Personally I like to wash my face after this to make sure any remnants of dye are removed, and put on my regular serums/moisturisers.
I hope you found this guide helpful – but feel free to ask any questions in the comments and we can chat down there.


No Comments Yet, Leave Yours!